


By Nat Hab Expedition Leader Eddy Savage
My Northern Lights Photography Kit
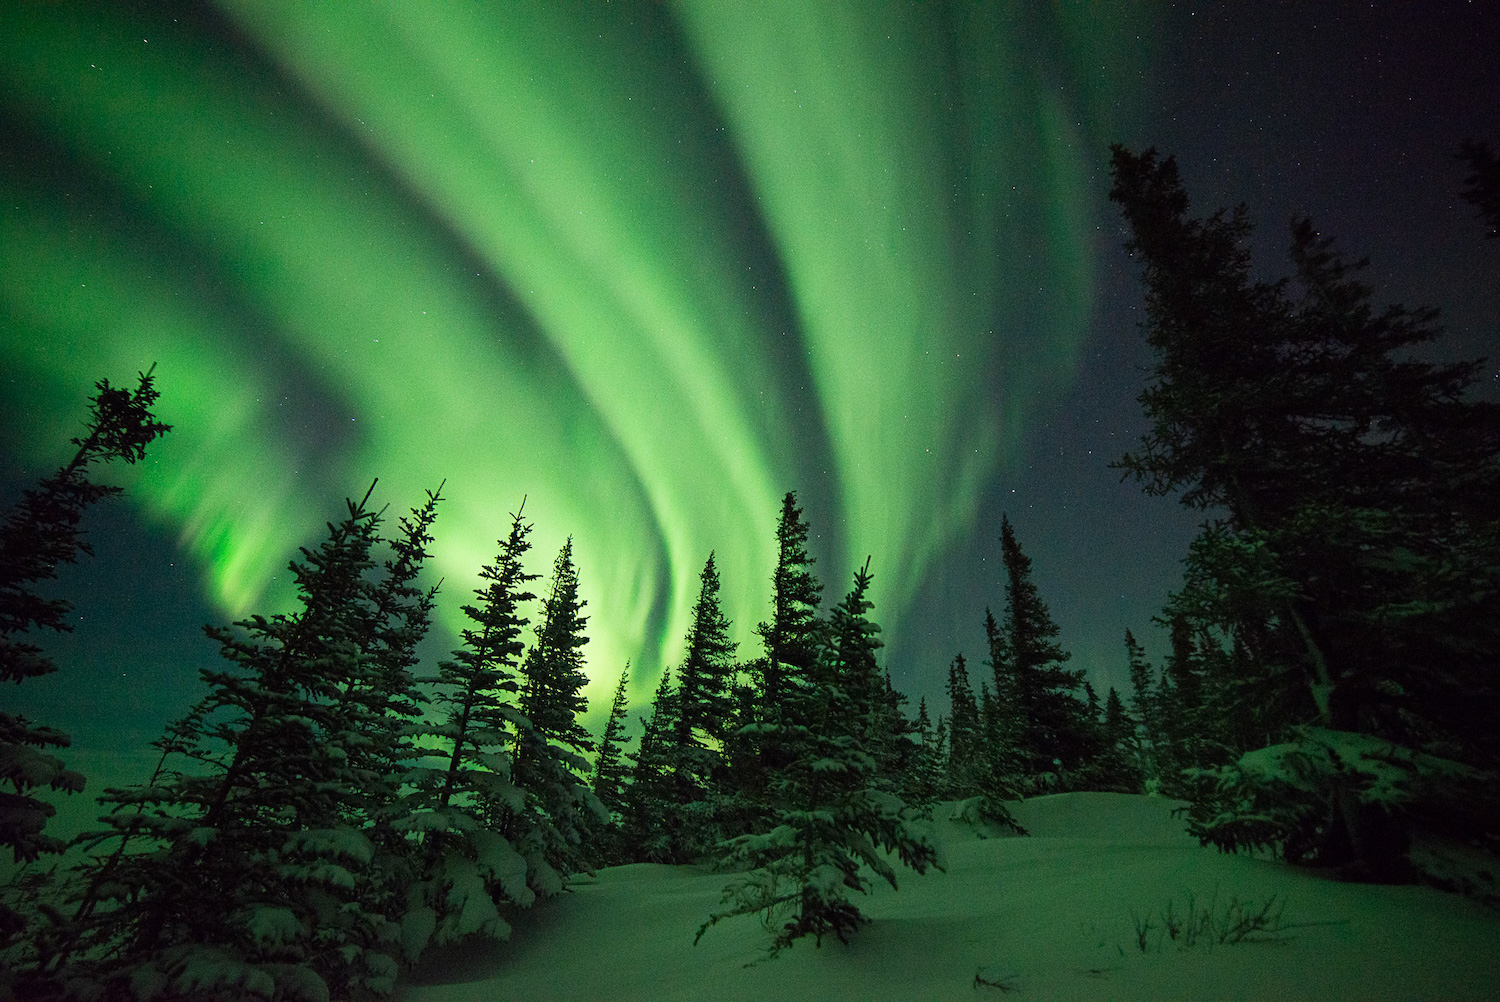
Chasing the aurora borealis is an exhilarating adventure. Standing outside, gazing up at one of nature’s most beautiful phenomena, is an experience that fills the soul. For many of my travelers, it is an experience they have dreamed of since childhood, and a journey to the community of Churchill and Canada’s subarctic in pursuit of the “Dawn of the North” is a once-in-a-lifetime opportunity.
The best time to look for the northern lights by far is during the middle of winter (February and March). The first ingredient, the aurora, occurs over 300 days of the year in Churchill and is almost certainly visible if the skies are clear. The second ingredient, long and dark nights, makes for optimal viewing conditions, and occasionally the aurora will appear shortly after sunset. Finally, the third ingredient is consistently cold weather that keeps the moisture of the Hudson Bay trapped beneath the sea ice, significantly reducing the likelihood of clouds. The ingredient of extremely cold weather is the most persistent hardship we endure on these expeditions. With air temperatures (without wind chill) often plummeting below -30°F at night, we must ensure our camera equipment and bodies are prepared to withstand the chill.
Fingers get cold fast, patience dwindles, and, unfortunately, frustration ensues. Having your photography kit well organized and prepared ahead of time will make your evenings out in the cold easier and more enjoyable. Better yet, practicing with your equipment in a warm and comfortable environment will significantly improve your experience and reduce your likelihood of technical frustration, which can be amplified by the cold. I have several key preparations in my Northern Lights Photography Kit that make my life easier and make photographing the aurora borealis a lot of fun.
Protect Your Hands
Most importantly, protect your fingers! All cameras have small buttons, switches, caps, focus rings and dials that require the dexterity of our fingertips. Before each season, I seek out a solid pair of glove liners that will fit inside my mitts and withstand the challenging subarctic photography environment. In my years as a northern lights photo tour leader, I have seen all shapes, sizes and materials of glove liners. I personally have thought on multiple occasions that having a merino-wool liner would be ideal, given their excellent warmth capabilities, but I have been repeatedly disappointed as the wool just isn’t strong enough to hold up to the cold camera dials, tripods, parkas zippers, camera bag zippers, etc. and results in holes quickly developing in these liners. My recommendation would be a “touch-screen” capable polyester or polyester-wool blend glove-liner. These liners are slightly more wind-proof than merino wool and are much stronger when handling camera equipment in extreme cold.

ⓒ Eddy Savage
Bring Lots of Batteries and Learn to Keep Them Warm
One of the most common reasons people need to stop taking pictures for the night is that their batteries are depleting rapidly. On a typical night, I use most of two DSLR batteries, which usually can last for 900 shots apiece, but in the extreme cold, I’m lucky to get 100 shots from each. Another aspect of battery longevity in the cold is how you care for them. You will want to be prepared to remove your battery whenever you’re not actively taking pictures and place it into a pocket close to your body so it can warm up. The extreme cold is unfriendly to battery life, and by practicing a strict regime of battery care, you can significantly extend the life of each battery. I left a fully charged battery in my camera after taking a dozen shots, left it for 20 minutes, and came back to take more pictures, but found that my battery was completely dead. Another challenge with batteries is removing them in the dark. Fumbling around your cold camera in the dark and trying to find your battery compartment and remove your battery can be a maddening endeavor unless you’re prepared for it. I highly recommend familiarizing yourself with removing and reinserting your batteries while sitting in the dark and wearing your glove liners. Practice this a few times and save yourself the arduous experience in -40°F.

ⓒ Eddy Savage
Bring the Right Headlamp
Having a good headlamp will make your life a lot easier. Sometimes I see people trying to use handheld flashlights or cell phone flashlights, and they are somewhat successful. I prefer being able to use both hands when manipulating my camera in the cold. Moreover, having a headlamp with a red light setting enables you to preserve your night vision while still being able to clearly see your equipment. If you’re bringing a new headlamp, I highly recommend practicing with it in the dark to learn about its features and how to adjust the brightness, color, and other settings. And of course, having a set of spare batteries for the headlamp never hurts!

ⓒ Eddy Savage
We’ll Provide a Sturdy and Easy-to-Use Tripod
One of the best pieces of equipment that Natural Habitat Adventures provides for travelers journeying to Churchill on a northern lights photo expedition is a collection of high-quality Manfrotto 055XPROB tripods. If you’re thinking about bringing your own tripod across the country and up to Churchill, think twice. These tripods are easy to adjust with gloves on, heavy-duty and won’t vibrate or fall over in the wind, and best of all, they don’t have to fit in ANY of your luggage because they already live in Churchill. Travel tripods, thin aluminum tripods, or any tripod with plastic pieces are prone to disaster in icy conditions. We have specifically selected these tripods for our groups because of their durability and ease of use. Unless you are adamant about bringing your own tripod, please take comfort in knowing we’ll lend you one of ours.


