
Getting This Shot | Grand Canyon Sunset
Sunsets in the Grand Canyon are truly dreamy. While each one is different, some of the basic tenets remain the same to get the shot.
1) Do your homework before heading to the Grand Canyon for local sunrise and sunset times.
Because Arizona does not participate in daylight savings, you may be surprised at how early the sun may set during the summer. Be sure to pick out a good spot and be there at least 45 minutes before the actual sunset time. Most of the great colors will be as it descends. Remember, because the rim is anywhere from six to nine thousand feet above sea level, the sun will disappear below the rim earlier than the horizon.
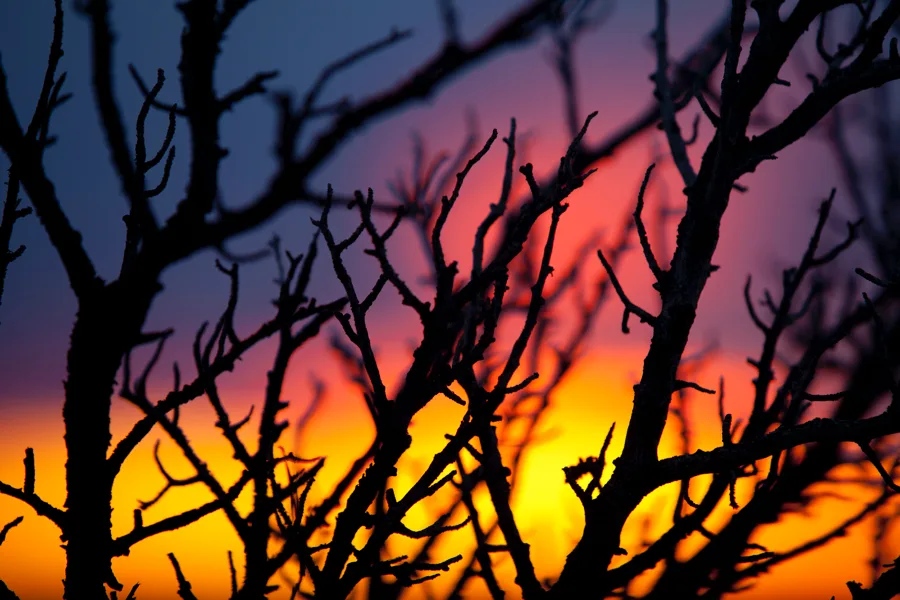
2) There are many ways to photograph the sunset, opens in new tab, but the technique used in the above shot is to fill the frame with color and balance it with the contrast of the silhouetted branches. To do this, you have to have a zoom lens on so that the entire frame can be filled with the bright part of the actual sunset – i.e., the sun and clouds immediately surrounding it. For the above shot, a 70-200mm f/2.8 lens, opens in new tab was used and zoomed in all the way to 200mm (for those with point and shoots, it’s roughly equivalent to a 6x zoom setting).
3) Lastly, you have to bring it all together. Being out at the right time…with the right lens capable of zooming…and being on a trail that gives you a good view of the sunset…while also having some foreground elements like these branches.
To physically take the shot, you need to have a wide aperture setting, opens in new tab like f/4 or close. For those with point and shoots, set your camera on the “portrait mode”. The reason for this is to force your camera to blur some of the branches and create a sense of depth in your photo. It also helps blur the sunset itself, creating an ethereal artistic look.
Lastly, you’ll need to set your camera’s autofocus point to the very middle of the viewfinder, and as small as a focus point as possible. This will allow you to “see through” the branches and focus on the bright part of the sunset. This, in turn, will also set your camera’s exposure so that it properly exposes the brilliant colors, thus silhouetting the comparatively darker branches. In reality, these branches are visible and lit to the naked eye. However, to balance between the bright sunset, the camera is forced to expose the shot in a way that the branches are darkened significantly. For the sake of this photo, it works perfectly.
The great thing about these tips is that they work with many other light and dark contrast scenes.
Go forward and give it a shot.